vue+ElementUI
创建工程
创建一个名为hello-vue的工程
vue init webpack hello-vue安装依赖,我们需要安装vue-router、element-ui、sass-loader和node-sass四个插件
1
2
3
4
5
6
7
8
9
10
11
12
#进入工程目录
cd hello-vue
#安装 vue-router
cnpm install vue-router --save-dev
#安装 element-ui
cnpm i element-ui -S
#安装依赖
cnpm install
#安装 sass 加载器
cnpm install sass-loader node-sass --save-dev
#启动测试
cnpm run dev安装报错,检查版本是否兼容,支持?
Npm命令解释:
- npm install moduleName: 安装模块到项目目录下
- npm install -g moduleName: -g的意思是将模块安装到全局,具体安装到磁盘哪个位置,要看npm config prefix的位置
- npm install –save moduleName: –save的意思是将模块安装到项目目录下,并在package文件的dependencies节点写入依赖,-S为该命令的缩写
- npm install –save-dev moduleName: –save-dev的意思是将模块安装到项目目录下,并在package文件的devDependencies节点写入依赖,-D为该命令的缩写
创建登陆页面
1 | <template> |
首页:
1 | <template> |
路由:
router==》index.js
1 | import Vue from 'vue' |
组件:
App.vue:
1 | <template> |
js文件:
main.js
1 | import Vue from 'vue' |
运行:
npm run dev
传递参数和重定向
两种方法皆可传递对象或数组等参数
一、方法一
页面传递参数
1
2
3<el-menu-item index="1-1">
<router-link class="txt-under" :to="{name:'profile',params:{id:'1'}}">个人信息</router-link>
</el-menu-item>配置路由参数接收
1
2
3
4
5
6
7
8
9
10{
path:'/hjc',
name:'haojiacheng',
component:hjc,
children:[
{path:'/user/profile/:id',name: 'profile',component:profile},
{path:'/user/list',component:list},
{path:'/main',component:main},
]
},页面获取参数 注意:==$route==
1
2
3
4
5
6<template>
<div>
<h1>个人信息</h1>
<p>{{$route.params.id}}</p>
</div>
</template>
二、方法二
开启props
1
{path:'/user/profile/:id',name: 'profile',component:profile,props:true},
传递参数(对象 student)
1
<router-link class="txt-under" :to="{name:'profile',params:{id:'1',student:student}}">个人信息</router-link>
接收参数
1
2
3
4
5
6
7
8
9
10
11
12
13
14
15
16
17
18
19
20
21
22
<template>
<div>
<h1>个人信息</h1>
<p>{{$route.params.id}}</p>
<ul>
<li v-for="item of student">{{item}}</li>
</ul>
</div>
</template>
<script>
export default {
name: "profile",
props:{
student:{
name:'',
age:'',
phone:''
}
}
}
</script>
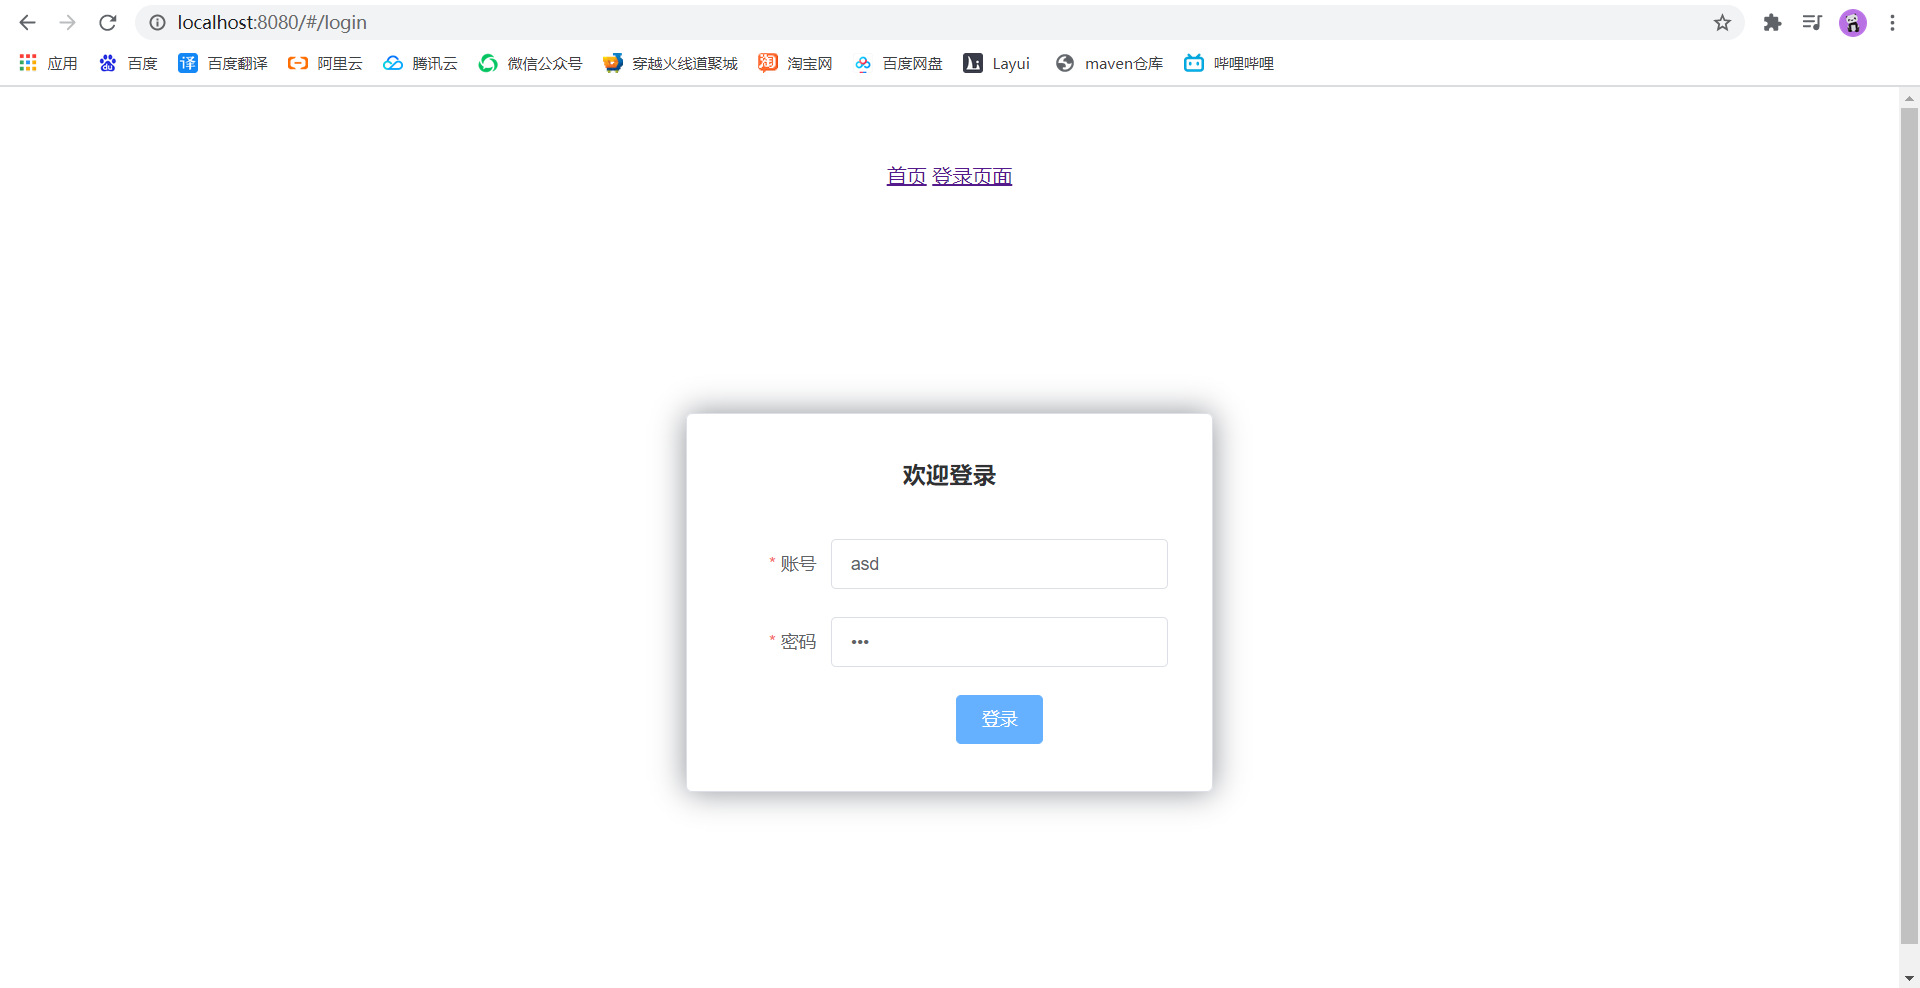
路由模式
路由模式有两种
- hash:路径带 # 号,如http://localhost:8080/#/login
- history: 路径不带 # 号,如http://localhost:8080/login
修改路由配置,代码如下:
1 | export default new Router({ |
404
处理404创建一个名为NotFound.vue 的视图组件,代码如下
1 | <template> |
配置路由 index.js:
1 | { |
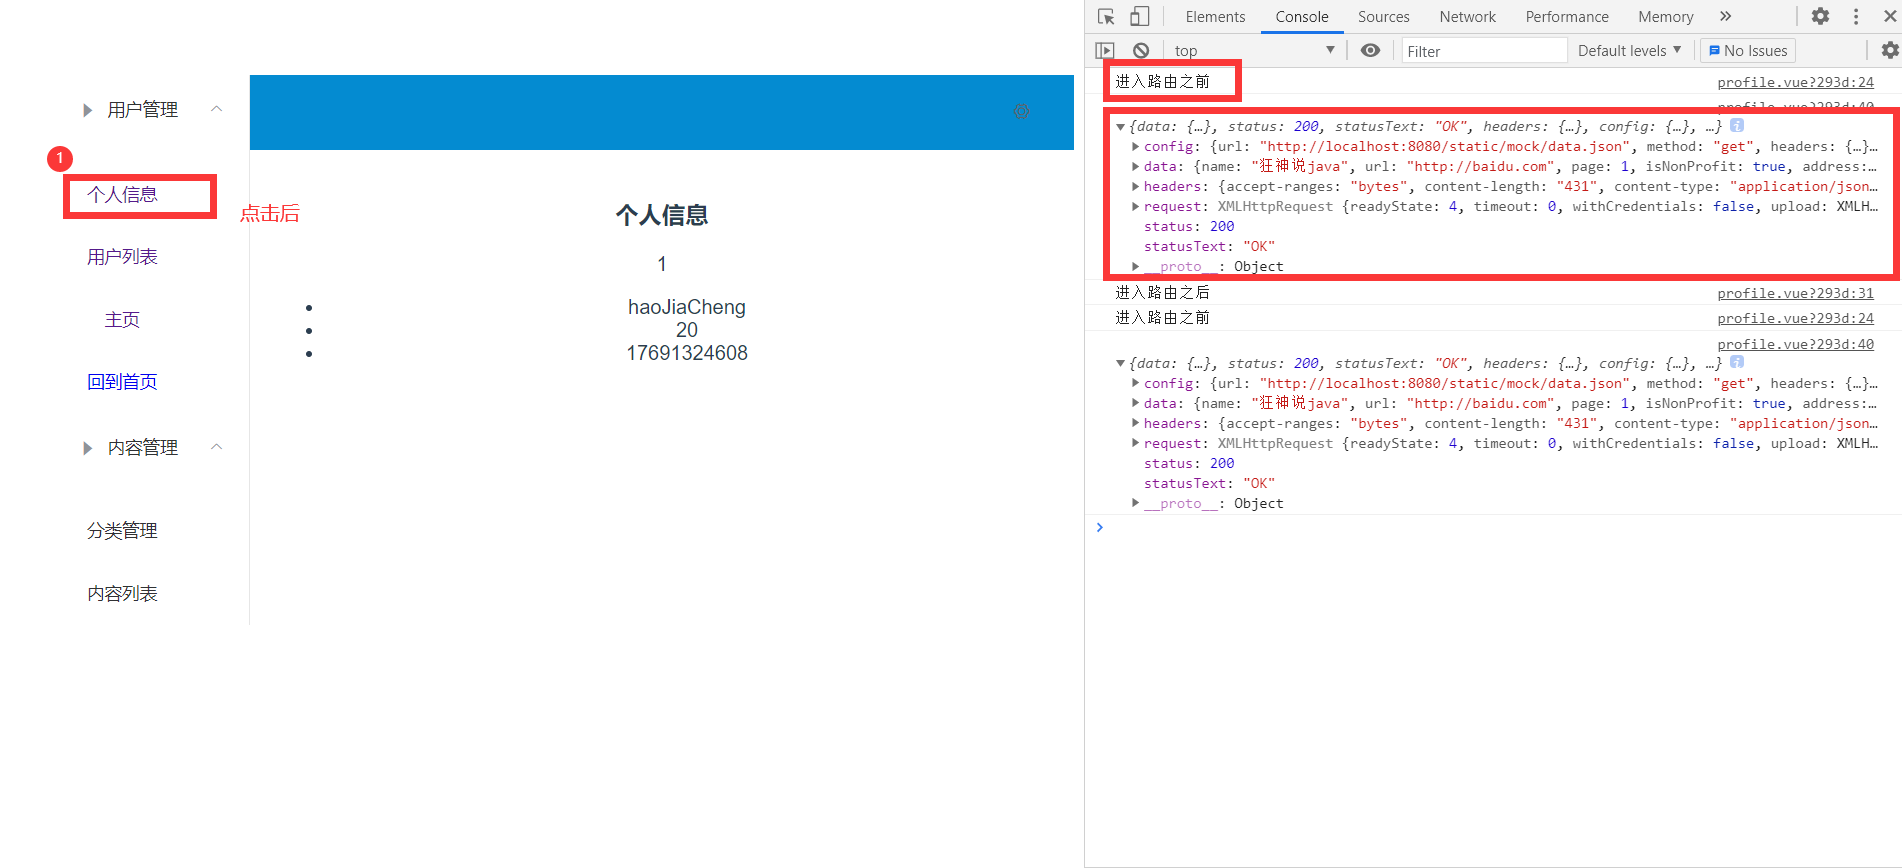
路由钩子与异步请求
beforeRouterEnter: 在进入路由前执行
beforeRouterLeave: 在离开路由前执行
上代码:
1 | beforeRouteEnter:(to, from, next)=>{ |
参数说明:
- to:路由将要跳转的路径信息
- from:路径跳转前的路径信息
- next:路由的控制参数
- next()跳入下一个页面
- next(’/path’)改变路由的跳转方向
- next(false)返回原来的页面
- next(vm=>{})仅在beforeRouteEnter中可用,vm是组件实例
在钩子函数中使用异步请求
安装axios vue-axios
cnpm install --save axios vue-axiosmain.js 引用Axios
1
2
3import axios from 'axios';
import VueAxios from 'vue-axios';
Vue.use(VueAxios,axios);在beforeRouteEnter中进行异步请求
1
2
3
4
5
6
7
8
9
10methods:{
getData:function () {
this.axios({
method:'get',
url:'http://localhost:8080/static/mock/data.json'
}).then(function (response) {
console.log(response)
})
}
}导入json文件,放入static下的mock中 data.json
1
2
3
4
5
6
7
8
9
10
11
12
13
14
15
16
17
18
19
20
21
22
23
24
25
26{
"name":"狂神说java",
"url": "http://baidu.com",
"page": 1,
"isNonProfit":true,
"address": {
"street": "含光门",
"city":"陕西西安",
"country": "中国"
},
"links": [
{
"name": "B站",
"url": "https://www.bilibili.com/"
},
{
"name": "4399",
"url": "https://www.4399.com/"
},
{
"name": "百度",
"url": "https://www.baidu.com/"
}
]
}npm run dev 运行访问结果如下: